How to Paint an RV Exterior
Project
Room
Cost
Skill Level
Is your vintage camper (or even your new camper) in need of a paint job? Give your RV a new lease on life with an exterior paint job. Follow these step-by-step instructions on how to paint your RV exterior.
Whether your RV is a pop-up camper, travel trailer, fifth-wheel, or motorhome, this guide will help you. Included is the prep work required before you start painting, how to remove the decals, and how to paint clean lines. Plus, we share top product recommendations so your camper comes out looking fresh.
Tools & Supplies
Instructions: How to Paint an RV
Over the years, we have successfully renovated three travel trailers top to bottom and including the exteriors. To give both rigs a fresh new look, this is the exterior painting technique that we recommend.
Want to check out both renovations? Here is the 2007 Keystone Hornet and the 2005 Keystone Hornet.
Here is how to paint your RV’s exterior.
Step
Wash The Exterior
Thoroughly wash your RV using a mix of warm water and a mild RV-safe soap or degreaser to remove dirt, dust, and road grime. Use a soft brush or microfiber cloth to scrub the surface. Rinse well and let it dry completely before moving on.

Step
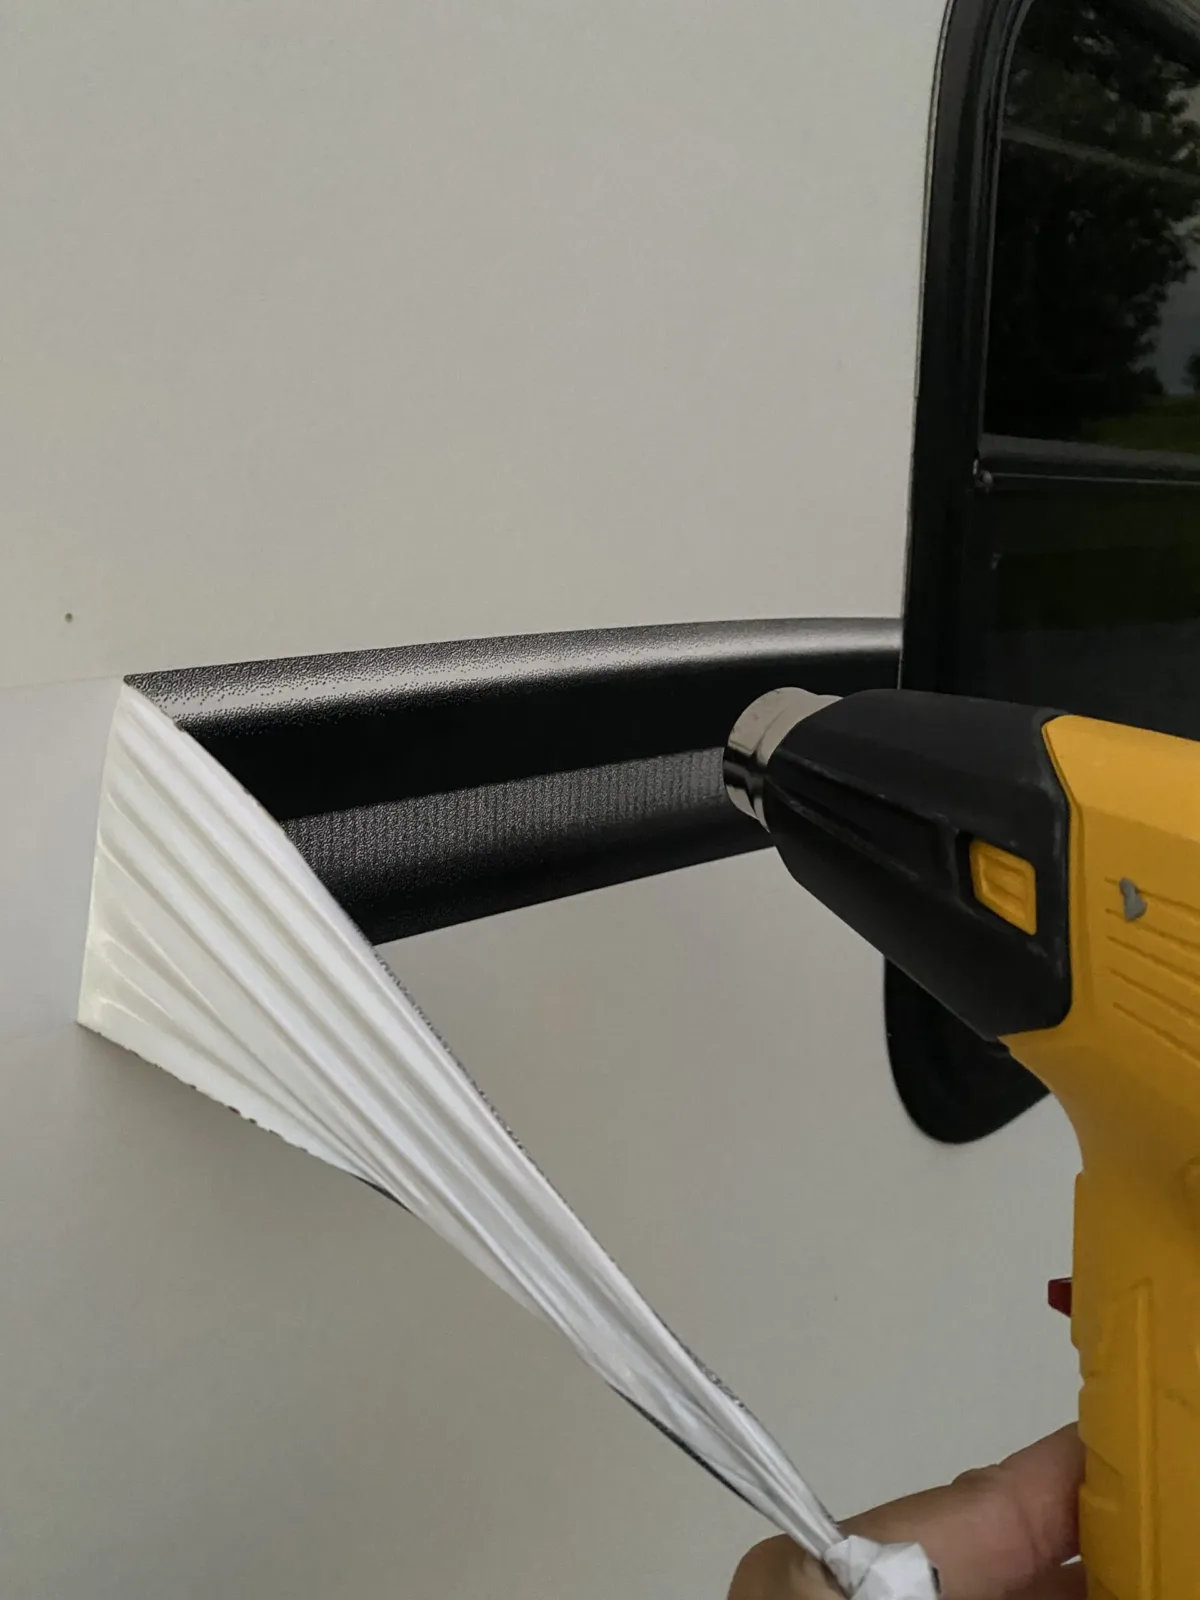
Remove Decals
Never paint over decals—they’ll cause peeling and uneven coverage. If you plan to paint over an area, the decals must go.
How to Remove RV Decals:
-
Heat the vinyl using a heat gun to loosen the adhesive.
-
Peel off the decal by hand—a 3M decal remover tool makes this much easier, especially for old, sun-baked decals.
-
Clean off leftover residue using a cloth and Goof Off or an adhesive remover. I’ve also found orange essential oil to work great as well.
Step
Tape/Mask Off Areas
Just like when painting your RV’s interior walls or even your home, start by taping off any areas you don’t want painted. Use masking film to cover larger sections and protect them from overspray.


Step
Lightly Sand
After taping off the areas you want to protect, sand all surfaces you plan to paint using an 80-grit sanding block. Lightly scuff the exterior to create a slightly rough texture—this helps the paint adhere properly.

Step
Clean
Wipe the RV’s exterior with acetone and a microfiber cloth to remove any oils that could affect paint adhesion. Then, use a damp microfiber cloth to eliminate sanding dust, followed by a tack cloth to pick up any remaining particles.
Step
Apply Primer
Using a paint sprayer, apply an even coat of primer. This step is essential for proper paint adhesion, a uniform surface, and better overall coverage.
Tip: Avoid painting in direct sunlight, on windy days, or when there’s dust in the air—these conditions can affect the finish.
Step
Apply 1st Coat of Base Paint
Using a paint sprayer, apply the first coat of paint in smooth, even passes. A sprayer gives the best finish, but technique matters. Keep these tips in mind:
-
Maintain a wet edge to avoid lap marks
-
Use steady, horizontal strokes
-
Keep the sprayer level and upright
-
Hold it 10–12 inches from the RV’s surface
Allow the first coat to dry fully, following the paint manufacturer’s instructions.

Step
Scuff
Once the first coat is completely dry, lightly scuff the surface with a scuff pad to help the next layer adhere smoothly and smooths out any small imperfections.
Wipe down the entire area with a clean, damp microfiber cloth to remove dust, then follow up with a tack cloth to catch any remaining particles.
Step
Apply 2nd Coat of Base Paint
Apply a second coat of paint to your RV’s exterior. If the finish still appears uneven after drying, lightly scuff the surface and add another coat.
Most RV exteriors will require 2–3 coats for full, even coverage—especially if the surface was heavily worn or patchy to begin with.
Step
Apply Clearcoat
Once the final coat of paint is fully dry, use your paint sprayer to apply a clear topcoat.
The clear coat adds a finished, glossy look while protecting the paint from chipping, UV damage, and fading. One even coat is typically enough, but you can apply a second for added durability if needed.
Step
Clean up!
Now it’s time to enjoy that beautiful exterior. Remove all painter’s tape and masking paper.
Once the paint has fully cured according to the Dupli-Color instructions (or whatever RV exterior paint you chose), buff the surface to enhance the paint’s look.
How to Protect Your RV’s Exterior from Damaging UV Light
Now that your RV’s exterior is cleaned up and freshly painted you’re going to want that finish to last. The sun’s harmful UV rays can make quick work damaging the finish on your motorhome or trailer. Over time, sun exposure can make your RV decals fade and can dull the finish.
Here are some simple ways to keep your RV’s exterior looking like new:
- Wax your RV regularly
- Park in the shade when possible
- Store your RV properly in the winter or invest in a high-quality RV cover
There you have it, 10 easy steps to paint an RV exterior!
Remember to properly prep the exterior surface so that the paint has something to adhere to. Go slow and do it right so you don’t have to do it again next season.