How to Paint RV Cabinets
Project
Room
Cost
Skill Level
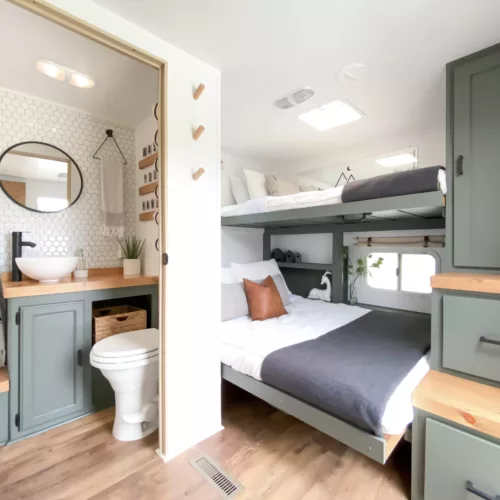
One way to completely transform the interior of your RV is by painting your cabinetry. Check out this step-by-step guide on how to paint your RV cabinets.
What is the Best RV Paint?
If you’ve decided to paint your RV cabinets, unfortunately, you can’t just slap whatever paint you have laying around on your cabinets and hope for the best. When it comes to RV paint, there are 3 different types:
- Latex paints
- Oil-based paints
- Water-based paints
Latex Paint
Latex paint tends to be the most affordable option and is also user-friendly. Once dry, it’s very easy to clean up.
That being said, latex paint can require a lot of prep work and a clear top coat to ensure it stands up to daily use.
Oil-based Paint
Oil-based paints are a popular choice for RV renovations because it’s very durable. This type of paint is also easy to clean (perfect for RVs) and tends to have minimal brush strokes.
However, oil-based paints have a strong odor. This can make painting in a small space (like an RV interior) a challenge. You’ll want to wear a mask and have proper ventilation.
Water-based Paint
The third RV interior paint option is a water-based paint. This type is ideal for RVs because it requires very little prep work. (For anyone thinking that there will be a paint that requires no prep work, think again – they all do).
The downside of water-based paint is that it can be more expensive than oil-based.
RV Cabinet Paint Recommendations
These are the paints that are recommended for painting RV cabinetry and referenced in this guide:
- Behr Cabinet & Trim Enamel
- Benjamin Moore Advance
- Sherwin Williams Emerald
- Behr Ultra Scuff Defense (This is a flat finish and I’ve had great results with durability)
How to Paint RV Cabinets
Whether you’re completely remodeling your RV to live in, or just need to freshen up your RV rental, painting your cabinets is a great way to update your RV’s interior.
Let’s jump into how to paint your cabinets!
Shopping List
- Degreaser
- 220 Grit Sand Paper
- Dap Extreme Stretch Caulk
- BIN Shellac Primer
- Paint
- Flood Floetrol (optional if using a spray)
- Cabinet Bumpers
- Poly (optional)
- Tack Cloth
Tools
- Foam Roller
- Paint Brush
- Graco Paint Sprayer (optional)
Instructions on how to paint your RV cabinets
Step
Remove the hardware
Remove all the doors and hardware from your RV cabinets.
It’s easier to clean, sand, and paint without having to cut around the hardware. If you choose to replace your cabinetry hardware, this is the time to do it!
Check out these stylish matte black drawer pulls.
Step
Degrease
Use a good degreaser and wipe down all the RV cabinets.
You want to remove any oily residue to ensure proper paint adhesion.
Step
Sand the cabinets
Use 220 grit sandpaper and sand all parts of the RV cabinets and doors.
This step is very important and should never be skipped. Sanding allows the primer and paint to adhere properly and will prevent any chips in the future.
If your RV cabinets are laminated and not solid wood, be careful not to take off the veneer. Older RVs may have solid wood cabinets and doors.

Step
Caulk any gaps
Use a little caulk to fill the space if you have any small gaps on the front of the RV door panels. Wipe any excess off.
Important: Be sure you use a DAP extreme stretch caulk when painting RV cabinet doors. Since RVs are susceptible to frequent temperature changes, you don’t want your caulk to crack!


Step
Prime
Now that you’ve cleaned and sanded the cabinetry, it’s time to prime the surface. Use a good primer like BIN Shellac Primer. Shellac primer has the best adhesion and prevents the oils from the wood coming through your paint.
Do one coat of primer on all parts of the cabinets. Wait 24-48 hours, then lightly sand and wipe down all the surfaces with a damp cloth or tack cloth to remove any debris before applying your first coat of paint.
Plan your RV renovation accordingly – you need to wait 24-48 hours before applying your first coat of paint.
Important: Do not skip priming! This step is important so that your paint doesn’t flake or scratch off in time.
Step
Paint
After waiting at least 24 hours after priming, it’s time to paint your RV cabinets.
Let your first coat of paint dry for about 24-48 hours, then apply a second coat in the same manner. Again, wait 24-48 hours, and once the second coat is dry, be sure to lightly sand and wipe down between the coats.
Tips for getting the best finish when painting RV walls:
- Get good quality paint. At least an eggshell or satin finish is recommended.
- Use a brush to get in the corners of the cabinet doors and use a foam roller to smooth the finish and remove brush strokes. You could also use a paint spray for a flawless finish. I recommend the Graco Magnum paint sprayer.
- To hide any brush strokes, roller marks, or even to get a spray finish smooth as glass, it’s highly recommended to use Flood Floetrol. Mix 8oz in 1 gallon of paint.
RV cabinet paint recommendations:
- Behr Cabinet & Trim Enamel
- Benjamin Moore Advance
- Sherwin Williams Emerald
- Behr Ultra Scuff Defense (This is a flat finish and I’ve had great results with durability)


Step
Seal with a poly coat
This step is optional, but it will seal your cabinets to prevent chipping. Use a matte water based polyurethane to seal the paint and prevent a long-lasting finish.
Step
Replace the hardware
Put hardware and doors back on.
Be sure to use bumpers on the corners of the doors and drawers, so the paint doesn’t stick together.
Be careful with the freshly painted cabinets for about 2 weeks. They take awhile to fully cure and have a durable finish.
More RV Renovation Ideas
After painting your RV cabinets, you may be on a roll with your RV renovations. Luckily, Happy Glamper Co is an expert in all things DIY RV renovation and has tons of guides to help with your next project.
Upgrade your RV window treatments with DIY curtains.
Do the interior walls need an update or refresh? Check out this complete guide for painting RV walls.
Love the look of shiplap but not the price tag? Try this $1 Sharpie Shiplap for a timeless look.
Make the exterior look as good as the inside. Check out this guide for painting your RV’s exterior walls.